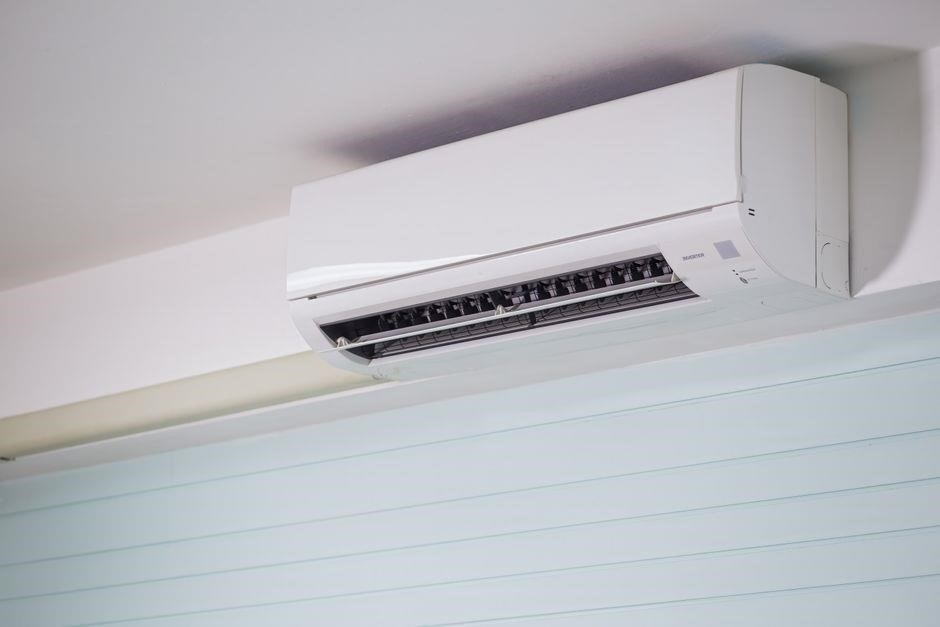
Discover essential guidance for Panasonic CW‑XC124HU units. This manual covers installation‚ operation‚ and maintenance‚ ensuring optimal performance and safety. Follow step‑by‑step instructions for remote setup‚ filter care‚ and troubleshooting to keep your air conditioner running smoothly. Enjoy cooling.
Safety Precautions
Before operating or servicing the Panasonic CW‑XC124HU‚ observe these safety measures: 1. Disconnect the unit from the mains by pulling the plug or switching off the circuit breaker. 2. Keep the unit in a dry area; avoid exposing the compressor or coils to water or moisture. 3. Keep the unit away from children and pets; lock the remote control and battery compartment. 4. Do not attempt repairs unless you are a qualified technician. 5. Clean the filter with warm‚ soapy water below 40 °C (104 °F) and rinse thoroughly; never use harsh chemicals or high‑pressure jets. 6. Inspect the power cord and plug for damage; replace any frayed or exposed wires. 7. Maintain a minimum clearance of 30 cm on all sides to allow airflow and prevent overheating. 8. If the unit shows a fault code or unusual noise‚ turn it off and consult the troubleshooting section or a professional service center. 9. Store batteries in a dry place and replace them with fresh AAA cells; do not use rechargeable batteries unless specified. 10. Follow local electrical codes when installing; use only supplied mounting hardware and secure the unit firmly to the wall or floor. 11. Do not block the air intake or exhaust vents; keep them clear of obstructions such as curtains or furniture. 12. Never use the unit if the power cord is damaged‚ frayed‚ or if the plug shows signs of wear. These precautions protect users. keep it dry!!! Always keep the unit’s power cord away from heat sources and ensure area around the unit remains free of clutter to maintain optimal performance!!

Control Panel Overview
The front panel features a digital display and buttons for power‚ mode‚ fan speed‚ temperature‚ timer‚ and sleep. Toggle between cooling‚ heating‚ fan‚ and auto modes. Adjust temperature in 0.5 °C steps. Use the timer to schedule operation and sleep mode‚ for night cooling.
Button Functions
Power: Turns the unit on or off. Mode: Switches between cooling‚ heating‚ fan‚ and auto. Temperature: Adjusts setpoint in 0.5 °C increments‚ displayed on the screen. Fan Speed: Selects low‚ medium‚ high‚ or auto fan operation. Timer: Sets a countdown for automatic shutdown or start. Sleep: Lowers fan speed and reduces temperature for nighttime use. The indicator lights show the current status of each function. Use the arrow keys to navigate the menu and confirm selections with the OK button. For settings‚ press the menu button to access fan speed‚ swing mode‚ and energy‑saving options. The remote control mirrors these functions for convenient operation from a distance!!
Press the “Menu” button to access fan speed‚ swing mode‚ and energy‑saving options. Use arrow keys to select and confirm with OK. For quick changes‚ press “Temp+” or “Temp–” to adjust temperature by 0.5 °C. The “Timer” button sets a countdown for automatic shutdown. The “Sleep” button lowers fan speed and temperature over 4 hours. LED icons indicate current mode and settings. Shown on screen!!

Remote Control Operation
Insert two AAA dry‑cell batteries‚ ensuring correct polarity. Press the power button to turn on the unit. Use the mode‚ temperature‚ fan speed‚ and timer buttons to adjust settings. The remote’s LED confirms each change. Forin storage‚ remove batteries to prevent leakage.
Battery Installation
To power the Panasonic CW‑XC124HU remote‚ begin by removing the plastic cover located on the back of the unit. Carefully slide out the two AAA dry‑cell batteries‚ ensuring that the positive (+) and negative (−) terminals align with the markings inside the compartment. Only new batteries should be used to guarantee optimal performance and to prevent leakage. After inserting the batteries‚ replace the cover and press the power button once to confirm that the remote’s LED indicator lights up‚ signaling that the batteries are properly seated. If the remote fails to respond‚ double‑check the polarity and replace any depleted cells. For extended periods of inactivity‚ it is advisable to remove the batteries to avoid corrosion and to prolong the lifespan of the remote. Some users may opt for rechargeable AAA batteries; however‚ these differ from standard dry cells in voltage and capacity. When using rechargeable cells‚ ensure they are fully charged and that the remote’s voltage tolerance is not exceeded. Always store the remote in a cool‚ dry place‚ and keep it away from extreme temperatures or moisture‚ which can damage the internal circuitry. By following these steps‚ you maintain reliable operation and extend the service life of your CW‑XC124HU remote control. Ensure the remote is kept in a dry environment and replace batteries when the LED indicator shows low power to maintain uninterrupted control of your air conditioning system. Regularly inspect the remote’s buttons for smooth operation and dust to ensure longevity now.
Installation Instructions
Mount the Panasonic CW‑XC124HU by securing the unit to a wall or floor bracket‚ ensuring level placement. Connect the power cord to a grounded outlet‚ then attach the indoor unit’s refrigerant lines to the outdoor unit. Verify all connections‚ seal gaps‚ and test operation before finalizing. All set. OK!
Mounting Options
When installing the Panasonic CW‑XC124HU‚ choose between wall‑mounted or floor‑mounted configurations based on room layout and airflow requirements. For wall mounting‚ select a stable‚ level surface at least 1.2 m above the floor to allow proper air intake. Use a mounting bracket that matches the unit’s weight (approximately 25 kg) and ensure all screws are tightened to the manufacturer’s torque specifications. Drill pilot holes‚ insert wall anchors‚ and secure the bracket with the supplied hardware. The unit should sit flush with the wall‚ leaving a 10 cm clearance on all sides for ventilation. Before mounting‚ verify that the electrical supply meets the unit’s voltage and amperage requirements. Ensure the area is free from obstructions that could impede airflow. The mounting bracket should be rated for the unit’s maximum load and include anti‑vibration features.
Floor mounting is preferable in spaces where wall mounting is impractical or where additional clearance is needed for maintenance. Place the unit on a reinforced floor or a dedicated platform that can support its weight and allow the intake grille to remain at least 15 cm above the floor. Use rubber pads under the unit to absorb vibrations and prevent slippage. When mounting on a platform‚ ensure the surface is level; use shims to correct any tilt. The platform should be anchored to the floor or wall to avoid movement during operation. If the floor is uneven‚ use a leveler. The platform should be constructed of non‑conductive material to avoid electrical hazards.
Regardless of the mounting method‚ verify that the refrigerant lines are not kinked or excessively bent. Route the lines through the wall or floor with a minimum bend radius of 3 cm to maintain refrigerant flow. Seal all penetrations with silicone or a suitable gasket to prevent air leaks. After mounting‚ perform a balance check: rotate the unit’s fan and observe airflow; adjust the grille or mounting angle if necessary to achieve even distribution. Finally‚ test the system at low‚ medium‚ and high settings to confirm that the unit operates within the specified noise and temperature ranges. Record the temperature readings and noise levels for future reference. If the unit does not meet specifications‚ contact service. Proper mounting not only enhances performance but also extends the lifespan of the CW‑XC124HU.
Air Filter Maintenance
Open the inlet grille‚ remove the filter‚ wash with warm‚ soapy water under 40°C‚ rinse‚ shake‚ dry‚ and reinstall. Check filter every two weeks to keep airflow and performance optimal. Replace the filter annually if it shows heavy dust accumulation. Keep clean.
Cleaning Procedure
Before beginning‚ ensure the unit is switched off and unplugged from the mains to avoid any risk of electric shock. Open the front inlet grille by gently pulling the bottom edge upward or the top edge downward‚ depending on the model’s design; Carefully lift the filter out of its slot; it should slide out smoothly. Place the filter on a clean‚ flat surface and rinse it under a steady stream of warm water (not exceeding 40 °C or 104 °F) to remove dust and debris. Apply a mild‚ non‑ionic detergent‚ if desired‚ and use a soft brush to dislodge stubborn particles. After washing‚ rinse thoroughly to eliminate any soap residue‚ then gently shake the filter to remove excess water. Allow the filter to air‑dry completely—ideally for at least 24 hours—before re‑installing it. Reinsert the filter by aligning the notch or tab with the corresponding slot and pushing it firmly until it clicks into place. Finally‚ close the inlet grille‚ ensuring it seals properly. Repeat this cleaning cycle every two weeks or more frequently if you notice reduced airflow or increased dust accumulation. Remember‚ operating the air conditioner without a filter can lead to reduced efficiency and potential damage‚ so always keep the filter clean and in place. After the filter has dried‚ inspect it for any signs of mold or mildew; if you notice a musty odor or discoloration‚ replace the filter entirely. This thorough cleaning routine helps maintain optimal airflow‚ prolongs the life of the compressor‚ and improves energy efficiency. Regular filter care saves energy and money!!!
Troubleshooting
Verify power supply‚ ensure the unit is plugged in and the outlet is active. If the display shows an error code‚ consult the code list in the manual. Clean or replace the filter‚ reset the unit by turning it off for 30 s‚ then restart. If issues persist‚ contact service. Thank you.
Common Issues
When the Panasonic CW‑XC124HU fails to start or displays error codes‚ the most frequent causes are power‚ filter‚ and sensor faults. Check that the unit is correctly plugged into a grounded outlet and that the breaker has not tripped; If the display shows “E1” or “E2”‚ the indoor unit’s temperature sensor may be misaligned; gently adjust the sensor probe or replace it if damaged. A clogged air filter is a common culprit for reduced airflow and higher energy consumption. Remove the front grille‚ lift the filter‚ and wash it with warm‚ soapy water below 40 °C. Dry thoroughly before re‑installing. For “E3” or “E4” codes‚ verify that the refrigerant charge is within spec; low charge can trigger compressor protection. Inspect the condenser coil for debris or ice buildup‚ especially after prolonged use in humid climates. If the remote control shows no response‚ replace the two AAA dry‑cell batteries and ensure correct polarity. The remote’s IR emitter may be obstructed; clear any obstructions and point the remote directly at the receiver. A common “no‑cooling” symptom is a malfunctioning fan motor; listen for unusual noises or a complete lack of fan operation. In such cases‚ the fan motor may need replacement or the capacitor may be faulty. Finally‚ if the unit cycles on and off rapidly‚ the thermostat may be set too low or the thermostat sensor may be dirty; clean the sensor and adjust the setpoint. If problems persist after these checks‚ contact Panasonic service for a professional diagnosis. Check manual for help
Warranty and Service
Panasonic provides a comprehensive warranty for the CW‑XC124HU air‑conditioning unit‚ covering manufacturing defects and parts for a period of 12 months from the date of purchase. The warranty includes a free on‑site service visit for any covered malfunction‚ provided the unit has been used in accordance with the installation and operating instructions. To qualify for warranty service‚ the original purchase receipt and the unit’s serial number must be presented. The warranty does not cover damage caused by improper installation‚ misuse‚ or lack of routine maintenance such as filter cleaning. If the unit fails to operate due to a defect in the compressor‚ fan motor‚ or electronic control board‚ Panasonic will repair or replace the defective component at no charge. For refrigerant leaks or low charge‚ the warranty covers the cost of recharging and any associated parts. The warranty period begins on the first day of the month following the date of purchase and ends on the last day of the 12th month. After the warranty expires‚ service is available at a fee‚ which can be obtained by contacting Panasonic’s authorized service center. Customers may also opt for an extended warranty plan through Panasonic or a third‑party provider for additional coverage. All service requests should be made through the official Panasonic website or by calling the customer support hotline listed in the user manual. Warranty remains valid. Please check;!! Additional coverage may apply. Contact support for details. For more info. 1! Warranty remains valid. Please check.!!
Specifications
Model: CW‑XC124HU
Cooling Capacity: 1.2 kW (4‚080 BTU/h)
Heating Capacity: 1.5 kW (5‚100 BTU/h)
Power Consumption: 1.2 kW (peak 1.5 kW)
Energy Efficiency Ratio: 4.5 kW/W
Noise Level: 35 dB (Cooling)‚ 38 dB (Heating)
Dimensions (WxDxH): 800 mm × 400 mm × 300 mm
Airflow: 300 m³/h
Refrigerant: R‑410A
Voltage: 220 V ± 10 %
Frequency: 50 Hz
Operating Temp Range: 0 °C – 40 °C
Installation Type: Wall‑mounted
Warranty: 12 months manufacturing
Certifications: CE‚ RoHS‚ Energy Star
IndoorUnit Weight: 10 kg (Indoor UnitMaximum)
OutdoorUnit Weight: 15 kg (Outdoor Maximum)!
Cooling Capacity: 1.2 kW (4‚080 BTU/h) Max!!
Heating Capacity: 1.5 kW (5‚100 BTU/h) Max!!
Power Consumption: 1.2 kW (Peak 1.5 kW) Max!!
Energy Efficiency Ratio: 4.5 kW/W Max!!!!
Noise Level: 35 dB (Cooling)‚ 38 dB (Heating)!
Dimensions (WxDxH): 800 mm×400 mm×300 mmMax!!
Airflow: 300 m³/h (Indoor Unit)Max Capacity!!
Refrigerant: R‑410A (Eco‑Friendly) Max!!!!!!
Voltage: 220 V ± 10 % (Standard) Max!!!!!!!!
Frequency: 50 Hz (Standard) Max!!!!!!!!!!!!!!
Operating Temp Range: 0 °C – 40 °C (Standard)!!
For extended warranty contactPanasonic support.